Deleting Appointments on the Appointments Tab
The intended purpose of Delete is to remove scheduling mistakes. Because of this, deleted appointments are not reported on in the same manner as canceled and no-show appointments.
To cancel or no-show an appointment directly from the Appointments tab,
- Navigate to the patient demographic screens, and select the appropriate patient.
- Click the Appointments tab.
- Use the filtering and grouping option to locate the appropriate appointment.
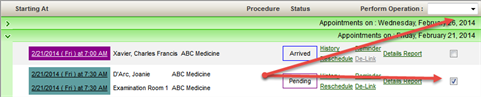
- Click the "operation" checkbox in the desired appointment line item.
- Click the drop-down in the Perform Operation field and choose Deleted. A pop-up confirmation will appear.
- Click OK to continue with the deletion. Click Cancel to abort the process.

If necessary, select multiple appointments and delete them in one operation.
Key Considerations
- Keep in mind that if you delete an appointment that is part of a recurring series, you will not be asked to delete the other appointments in the series as you are on the grid. The intention of the workflow on the Appointments tab is to apply the function to only the appointments that you have had "hands on."
- Complete similar steps on the group Appointments tab.
See also, Deleting Appointments
